Friday, November 5, 2010

Cider

Wow, how time gets away from us these days.  If there is a busier time of year than Spring for us, it's definitely Autumn.  One of the big projects I had been planning for ages was to brew a batch of hard cider from scratch.  As I watched the apples ripen this summer I finally took action.

The most important piece of the process was to procure a press.  With a limited budget and a DIY spirit I planned out a simple press made from common hardware store items.  One thing I realized pretty quickly is that there is more than one way to crush an apple.  In the States we usually see cider presses made from a barrel of wood slats inside a cast iron frame.  This design clearly didn't lend itself to our budget or abilities.  The more exciting cider press design is the sort used widely in the UK.  It is basically two boards with a bag of apple pulp in between.  For around $50 I was able to gather the needed pieces to throw together a plywood and 2x4 bottle jack powered cider press.


Note: The plywood I used is made from oak.  I've read using pine can hurt the flavor of the cider.

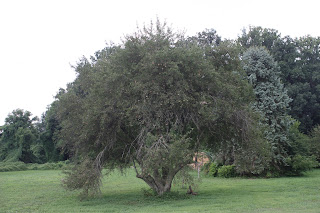
After collecting two large shopping bags full of apples from our aging, unhealthy, unidentified apple tree, we were in business.

With the help of a couple of friends we crushed the apples in a bucket using the advanced "log jamming" technique (similar to the process employed by Native Americans to crush corn). Once crushed the apple pulp was put in a nylon mesh bag (the sort used to filter wine grapes).  The squeezing process was started and continued until the 2x4s gave creaking and popping sounds that let us know the maximum pressure had been reached.

We pasteurized the raw cider just because we're sissies.  We then pitched some cheap Nottingham Ale Yeast that was laying around in the fridge.  The result was a slightly sour but intoxicating dry cider.  While not a great brew, I suspect the final result had more to do with the poor quality of the apples and yeast selection than with the process or equipment.  Though I'm completely satisfied with our efforts, it's a shame we will probably have to wait another year before we can experiment further.

Sunday, August 8, 2010

Planning for Canning

I know the beginning of August is still smack in the middle of the summer season, but for some reason, to me, it always feels like the very edge of Autumn. I think it has something to do with the fact that, as the harvests start coming in, it becomes time to start freezing and canning in preparation for winter, and planting fall crops in the spaces that have been opening up in the garden. The days are already noticeably shorter, and the apples are starting to weigh down the branches of our old Duchess tree.

Thus, the Gardener has built an inexpensive little cider press and we've been experimenting with our windfall apples. We've collected a little more than a gallon of juice, and in the next few days we'll try making our first batch of hard cider.

This past week we've also received our first share of fruit from the North Star Orchard CSA. In our bag were Summer Blaze and Redfree apples, Red Haven and White Lady peaches, Vanette and Oullins plums, and Delight pears. Though we're really enjoying eating these fruits as they are (fresh, crisp, and juicy!), I've also been planning out how I'm going to can some of them for winter. For the most part, I think I'm going to keep my recipes pretty simple, to highlight the natural flavors of each variety of fruit, but I've also got plans for some more interesting spreads like honeyed yellow tomato butter, which I'm thinking will go well with our almost-done-aging farmhouse cheddar.


What else makes it feel like the start of Fall? 45 pounds of Desiree, Carola, and Yukon Gold potatoes harvested and stored away, that's what!

Sunday, July 18, 2010

Backyard Beverages

Call it a hippie clichĂ©, old fashioned, backwater brew or what have you, but we decided to try a batch of dandelion wine.  Of the many stories I've heard about it, I've never known anyone who has actually confessed to making or drinking dandelion wine.


We did our best to follow a "Pennsylvania German" pre-prohibition recipe we found randomly on the web. Warning: this recipe calls for a lot of sugar.

We had a really hard time getting the yeast to start and were about to start over when it quickly fermented the dandelion syrup into something passable as an adult beverage/cleaning product.

Almost ready to bottle. We'll give it another week or so in the secondary fermenter.


This hasn't been the only experimental drink we've been working on. Inspired by a post over on Hunter Angler Gardener Cook we tried a bit of homemade root beer last night.

We took the easy track for the first attempt by making it in the common form as a non-alcoholic soda.

Luckily we have a sassafras tree in our back yard so collecting a bit of root was as simple as pulling up a few of the saplings surrounding the main tree and cutting off the roots.


We made sure to hang on to the leaves in hopes of making filé powder for gumbo. We'll let you know how that goes.

Cutting up the roots before boiling them was a good bit of fun.  It was the first time we've had a need to use our loppers in the kitchen. The pint jar there is full of root beer syrup.


We've also been in the habit lately of using our mixer (with attachment) to make ice cream.  I couldn't resist having a root beer float using a bit of our last batch of vanilla ice cream.


Words can't describe how good it was. I'm tempted to head to the kitchen for another one right now.

Monday, June 21, 2010

Room for Improvement, Soil Improvement

This being our first growing season in the new house, we're starting to find out what does well in our soil and what really doesn't.  We've yet to do a soil test, and we haven't added any amendments, but we're working on that.

Last weekend we had the wonderful opportunity to attend a potluck dinner with the Community Gardens of Chester County.  Dinner was amazing and made even better by a talk on the manufacture and use of biochar by our gracious host.  The wheels are already turning as to how we'll be adding this medium to our soil.  Our big hope is that we can lighten the heavy clay in our soil with material sourced from our own yard.


Our garlic, it appears, doesn't like our heavy soil much at all.  The Gardeness dug up the German Extra Hardy today, and even though the leaves looked fine, almost all of the bulbs are rotten.  The Romanian Reds seem to have fared better, but they're small, with only a couple of cloves each.  I hope this doesn't mean bad news for our potatoes as well.  As you might recall from last year, the Romanian Red was the variety that survived when the other rotted out then too.  It's really important to me that we keep this stock going, even if that means replanting all of it this fall and having nothing to cook with.

On a brighter note, our heirloom family corn seems to feel right at home, and all three varieties of beans have sprouted and are growing nicely.  Our goal is to find plants that do well here naturally, and save those seeds year after year.

When Life Gives You Thistles, Make Some Cheese!

What's missing when you have a fresh peasant loaf and a bottle of homemade ale? Some good cheese, of course! We decided it was high time to fill that void, so we set out to make some farmhouse cheddar. We ordered starter, rennet, and a mold from the New England Cheesemaking Supply Company and bought two gallons of good quality raw grassfed Jersey milk from a local Amish family. We visited their farm and got to see their happy cows and clean facilities, and we were really impressed! They also sell sheep's milk, which we may have to try another time!

So to make a farmhouse cheddar, you heat the milk gently to 90 degrees, add some mesophilic starter, and let it ripen for 45 minutes. Then you add the rennet and let it set at that temperature for another 45 minutes until it breaks, at which point you cut it into curds.


You slowly bring up the temperature of the curds to 100 degrees, and then drain them by pouring them into a cheesecloth and hanging it for an hour.

Once drained, you break the curds up into small pieces, and mix in some salt.

Then you pack them into a cheesecloth lined mold and press, applying 10 pounds of pressure for 10 minutes, then 20 pounds for 10 minutes, and lastly 50 pounds for 12 hours. Afterwards, the cheese is removed from the mold, the cloth is carefully peeled away, and it's left to air dry for 2 - 4 days, allowing a rind to develop.

At that point you can wax or bandage it, and let it age for a couple of months. Just as with all food preservation methods, so long as you pay attention to cleanliness, there's not much else to stress about.

We plan on making a mother culture from our store bought starter, and we've read that we can make rennet from our thistles! Now if only we had a cow...

Friday, May 21, 2010

So Many Things to Learn

Today I've been repeatedly faced with my gardening shortcomings. First, I found out that my Canada Thistle eradication efforts were only making things worse. Our front flower bed, which runs the entire length of the house, is completely infested with these evil weeds. I thought that by pulling them out before they flowered I would be making good headway. Turns out that each time you break the root, it produces several more plants. So... I guess I'm going to try cutting them off at gound level as often as possible in hopes that I'll eventually weaken the root systems enough that they'll stop growing back.


Then, I moved my seedlings outside this morning to continue hardening them off in preparation for planting them this weekend, and I took a good look at them. Even though we had fluorescent lights on them for 16 hours a day, and also had them in a south facing window, they don't look a heck of a lot better than the ones we started last year. At least my tomato plants aren't pale or leggy this year, but instead are dark purple and still very small, with only a couple of true leaves at this point. When I looked at a gardening forum this morning, where purple tomato seedlings were the topic of discussion, I was really disheartened to see what other people's tomato plants looked like by the time they're getting them in the garden. They've got to be 20 times bigger! My seedlings always look like this, though, and usually survive just fine (except when a late frost comes in, like last year). But I can't help but think how much earlier I'd get fruit and how much better the crop would be if they had a better start.


And finally, when I checked the garden for progress, the potatoes are coming up (yay!) but the peas haven't grown much in the last couple of weeks, and the spinach is pretty much non-existant. It came up about a week after I planted it, but since then it's barely grown at all. I know the last week in April is a bit late for spinach, but we planted it the same time last year, and had no problem. Perhaps it was the freak weekend of almost 90 degree weather we had shortly after I put the seeds in the ground. Maybe the soil isn't to their liking. I just don't know...


But it's a beautiful day outside, so I'll try not to dwell on it. Learning from mistakes is all part of the process.

Monday, May 17, 2010

Week 1: Buy Better Milk

After watching Food, Inc. and No Impact Man recently, we realized that we've been getting kind of lax with some of our lifestyle choices. Having a baby definitely makes it tempting to do things based on convenience rather than conscience. So to get ourselves back on track we've decided to make one new resolution each week that we'll try to make a part of our everyday lives.

This week, we're going to stop buying supermarket milk. We like Stoneyfield, but we're lucky enough to have a great local company that sells grass-fed, certified organic, gently pasteurized milk that comes in returnable glass bottles.


I'll have to go a little bit out of my way to get it, and remember to wash and take back the bottles, but it'll be worth it. Not only does their milk taste like real milk, but we'll also be getting extra CLA and Omega-3 fatty acids. All of their farms are located in Lancaster County, so it should all come from about 50 miles away or less. And we won't have to worry about what the packaging is made of or where it goes after we're done using it. And even though it costs a little bit more, the money we spend stays local and supports our farming neighbors. If you're interested in finding local grass-fed milk, check out Eat Wild.